|
|
|
|
|
COLLECTION
|
FEEDBACK
|
|
Technical Zone
the master class
| Continuing
from yesterday we identified the controls or at least what to look for.
Now we have to use them in anger.
|
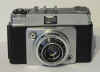
Simple Viewfinder type |
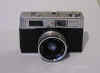
Viewfinder with Lightmeter |
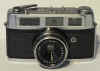
Rangefinder with Lightmeter
|
||
|
Remember the four fundamentals of photography, whether it's
film or digital, are Speed, Aperture, Sensitivity and Focus. In our case
we have the sensitivity fixed by the type of film we choose. In order to achieve a correct exposure we need to ascertain how much light is being reflected by the subject we are going to photograph. If we are lucky we will have a lightmeter which can give us a guide, otherwise we are down to knowledge or at least a good guess. The lightmeter is not the magic elixir in this situation because it can easily be fooled but it gives us a good basis to work from. We now have to meter the light and set the exposure. In this first example I will assume a lightmeter is fitted which uses the EV principle. Lets assume we are using a film rated at 200 iso and we have set the sensitivity accordingly. The lightmeter shows an EV of 12 and when we transpose this to the lens we see that this equates to f8 at 1/125 sec but this could also be f11 at 1/60 or f5.6 at 1/250 etc. For those less fortunate individuals without a lightmeter we have to resort to good old fashioned guess work. Ah, but help is at hand. In the box below is a guide table set out in 2 parts. The top grid is Shutter Speed (1/whatever) priority and the lower grid is Aperture (f something) priority. This grid is based on an ISO rating of 200 so if other film type is used compensation needs to be made by moving up or down a line. i.e. if we are using a film rated at 100iso we need to use a slower speed or larger aperture. We should both now be at the same point, we know what optional settings are going to work for the given light conditions. Now we need to ascertain what we want from our picture. Do we want sharp focus from foreground to infinity or maybe we want to highlight a subject by putting the background out of focus. Either of these effects can be achieved by using the "depth of field" indicator, if we have one. If you haven't it's not crucial it just means we don't have a definitive guide to the distances involved, the principle is the same. Also as most lenses used on compact cameras are close to the example used you can use this as a guide. You will remember yesterday there was a calibrated ring which I said to ignore, well now is the time to cancel that remark. If you look at it you see a diamond in the middle with a scale on either side corresponding to the fstop markings. If you now set a distance against the diamond of say 11 feet and you are using an aperture setting of f8 the depth of field can be measured by reading the 8 on either side. This will probably be somewhere around 8 feet to around 20 feet. This is the depth of field for this given setting, now if you were to change to using f11 you would take the readings from the 11 on either side this now gives us something like 7 feet to 25 feet. What this shows is that the higher the fstop number the greater the depth of field. So going back to the previous paragraph, if we want sharp focus from front to back we set a high fstop. However if we want to highlight the subject without background distractions we use a low fstop. There is, however, a trade off because the higher the fstop the slower we need to set the shutter speed. This in turn has an effect on the possible level of camera shake and will make it more difficult to "freeze" a moving object. A good rule of thumb when shooting without a tripod is not to select a speed slower than the focal length of the lens. Look at the front of the lens and it will have some details on it like 1:2.8/45, this indicates a maximum aperture of f2.8 and a focal length of 45mm, this means we should use a speed greater than 1/45 sec. Hopefully you should now know enough to get you started, if you need any more detail than this you will have to request an advanced master class. The charts below will give an indication of settings but bear in mind this is based on open space, if you are in a shaded area you will need to compensate for this. The first column on the left "General Guide" and "f8 and be there" are quick reference guides and will give a reasonable "average" result in most circumstances. F8 and be there was an expression used by press photographers of yesteryear when they had to guess at exposures in a hurry while holding the camera above the crowds and it served as a rule of thumb. NOW STOP READING AND START TAKING PICTURES
|
|
||||||||||||||||||||||||||||||||||||||||||||||||||||||||||||||||||||||||||||||||||||||||||||||||||||||||||||||||||||||||||||||||||||||||||||||||||||||||||||||||||||||||||||||||||||||||||||||||||||||||||||||||||||||||||||||||||||||||||||||||||||||||||||||||||||||||||||||||||||||||||||||||||||||||||||||||||||||||||||||||||||||||||||||||||||||||||||||||||||||||||||||||||||||||||||||||||||||||||||||||||||||||||||||||||||||||||||||||||||||||||||||||||||||||||||||||||||||||||||||||||||||||||||||||||||||||||||||||||||||||||||||||||||||||||||||||||||||||||||||||||||||||||||||||||||||||||||||||||||||||||||||||||||||||||||||||||||||||||||||||||||||||||||||||||||||||||||||||||||||||||||||||||||||||||||||||||||||||||||||||||||||||||||||||||||||||||||||||||||||||||||||||||||||||||||||||||||||||||||||
|
Website hosted
by obscura135
|

 ©35mil
Plus all rights reserved
©35mil
Plus all rights reserved